10 Tips to Organize Kids Art Supplies Efficiently
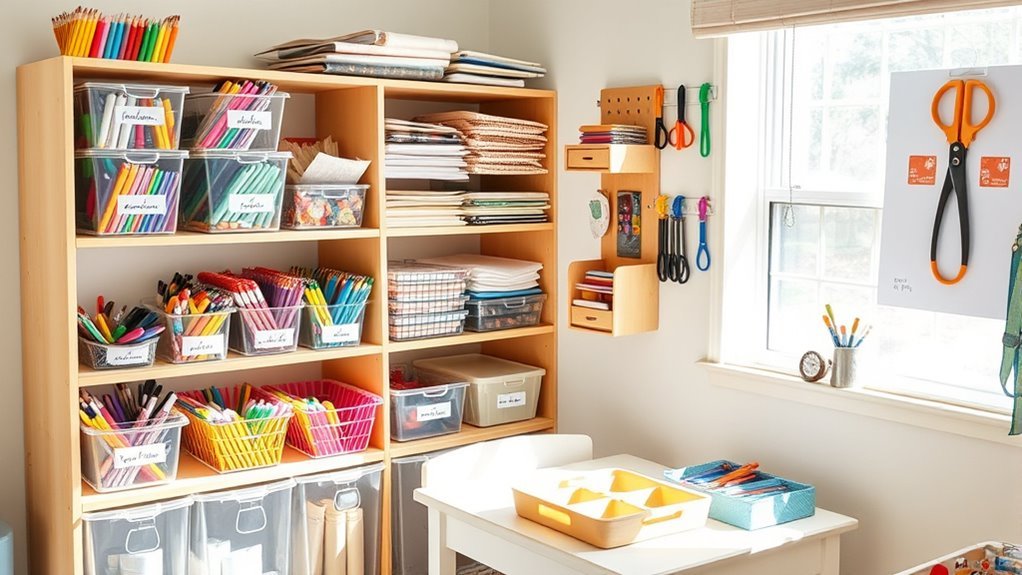
Start by sizing up your space and sorting through supplies to toss anything broken. Group items like paints and crayons. Then use clear, stackable containers with labels or colors for easy ID.
Create portable storage like caddies or rolling carts for flexibility. Keep paper and books upright in holders, and set zones for different activities.
Store frequently used items at kid-friendly heights to encourage independence. Stick with these tips, and you’ll uncover even more ways to streamline your art space.
Key Takeaways
– Measure storage space and categorize art supplies by type for efficient organization and easy access.
This way, everything has its place, and you can find what you need without the hassle.
– Purge broken or dried-out supplies regularly to maintain a functional and clutter-free collection.
It’s amazing how much easier art time is when you only keep what actually works!
– Use labeled, color-coded containers and create designated zones for different art activities.
It helps kids know exactly where things belong, making cleanup a breeze.
– Employ clear, stackable, and portable storage solutions with adjustable compartments for flexibility.
These make it super easy to customize as your collection grows or changes.
– Store supplies at child-friendly heights with picture labels to foster independence and encourage cleanup.
Kids love being able to grab what they want and put things away on their own!
Assess Your Space and Supply Needs
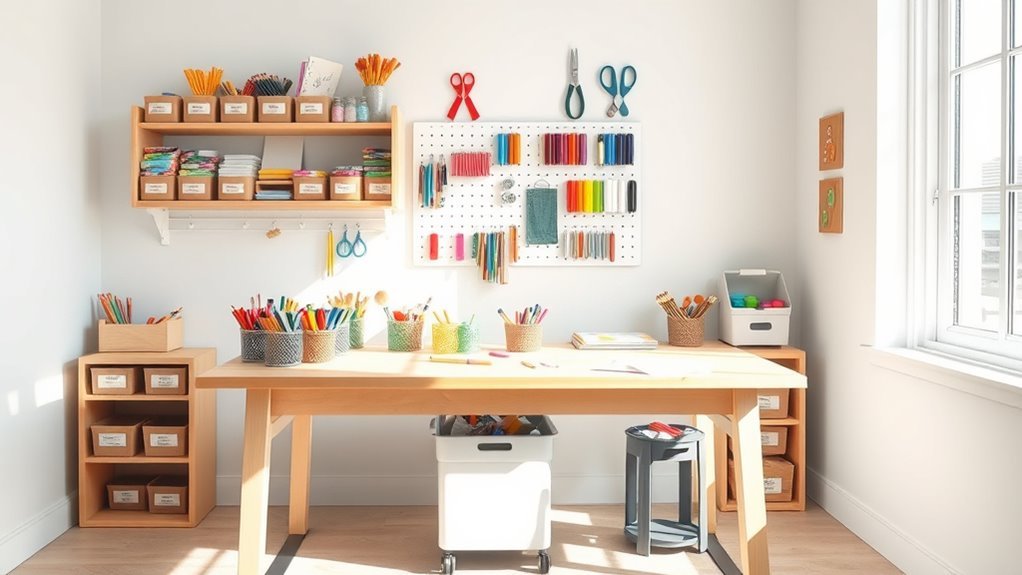
Before organizing your kids’ art supplies, you should measure the available space and take stock of what you have. Knowing the size of your storage area helps you pick containers that fit perfectly without wasting space.
Next, evaluate your current supplies to identify what’s useful and what’s broken or rarely used. Categorize items like paints, markers, crayons, and paper to understand their specific storage needs.
Consider how often your kids reach for certain supplies—store frequently used items where they’re easy to grab and less-used ones in less accessible spots. Also, think about safety; if young children are around, keep dangerous items out of reach.
This step ensures your organizing supplies and storage will be both efficient and practical for your family’s daily creative needs.
Sort and Purge Unnecessary Items
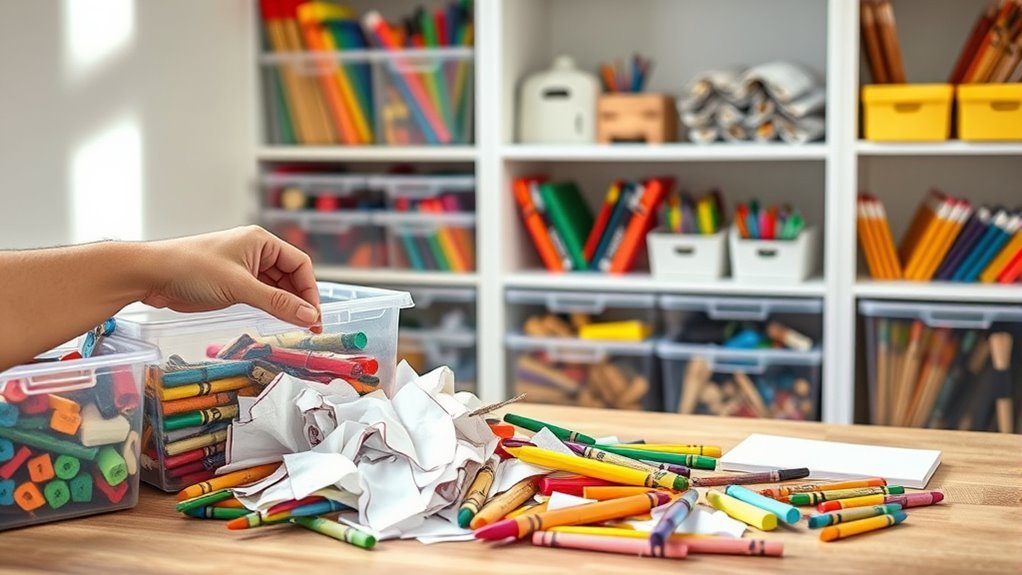
Start by sorting through your kids’ art supplies and tossing anything broken or dried out.
Then, group the remaining items by how they’re used to make finding materials easier.
This simple step will help you keep the collection neat and ready for creative projects.
Declutter Broken Supplies
Although organizing art supplies can feel overwhelming, regularly sorting through and decluttering broken or unusable items makes a big difference.
To efficiently organize kids art supplies, start by inspecting your collection for broken supplies like dried-out markers, cracked crayons, or damaged brushes. Toss any fully used or expired materials, such as empty glue bottles or dried paint tubes, to free up valuable space.
Also, remove supplies with missing caps or damaged tips to keep only functional tools handy. Establish a routine for seasonal checkups to prevent clutter buildup and keep everything in good condition.
Categorize By Use
When you categorize art supplies by their use, you’ll quickly spot duplicates and items you no longer need. Start by grouping paints, markers, paper, and other materials separately.
This method not only streamlines organizing but also makes it easier for kids to find what they want independently. As you sort, purge broken crayons, dried-out markers, and any supplies that have outgrown your child’s interest.
Regularly reviewing these categories prevents clutter from building up again. Label each group clearly to maintain order and speed up cleanup.
Group Supplies by Category
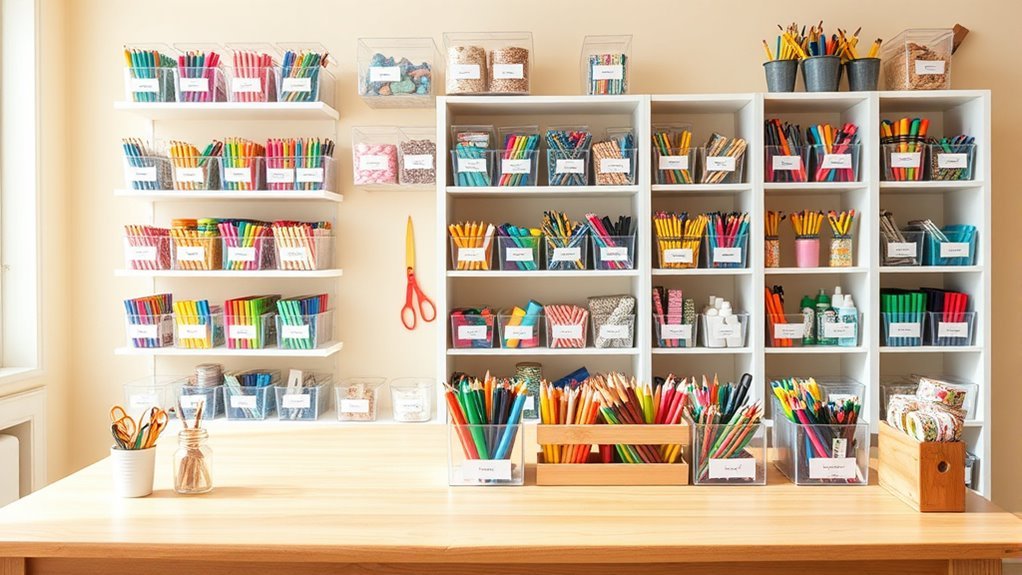
Start by defining clear categories for all your art supplies, like crayons, markers, and paintbrushes. Separate similar items into labeled containers to keep everything easy to find.
You can also use color coding to make organizing and returning supplies a breeze. It really helps keep things neat and saves time when you’re looking for something.
Define Clear Categories
Since organizing kids’ art supplies can quickly become chaotic, defining clear categories helps keep everything neat and accessible. To organize your kids art effectively, start by grouping supplies into categories like paints, markers, crayons, paper, and craft accessories.
Use separate containers or bins for each category to avoid mixing and make cleanup easier after projects. Label each container clearly so your kids can quickly identify and return items on their own. This system promotes independence and reduces frustration during art time.
Don’t forget to regularly review and adjust categories as new supplies come in, ensuring your organization method stays relevant and efficient. Defining clear categories is the foundation for a well-organized art space that encourages creativity without the mess.
Separate Similar Items
Although art supplies can quickly pile up, separating similar items into distinct groups makes finding what you need much easier.
To organize kids’ art supplies efficiently, group crayons, markers, and colored pencils separately. Use labeled containers or small compartments within bigger bins to keep paints, stickers, and craft tools distinct.
Storing related items together—like all stamping supplies in one bin and paper cutouts in another—streamlines both use and cleanup. This method not only reduces clutter but also helps your kids quickly locate materials needed for their projects.
Make it a habit to regularly review and reorganize these categories to maintain order. By separating similar items, you create a system that keeps art supplies accessible and encourages creativity without the mess.
Use Color Coding
How can you make finding art supplies faster and more fun for your kids? Use color coding to group supplies by category. Assign colors like red for paints and blue for markers, and use matching containers or labels.
This system visually organizes the space, making it easy for your kids to quickly identify and select the right materials. Color coding not only keeps your craft supplies organized but also reduces the time spent searching.
Plus, it encourages children to develop independent habits by helping them return items to their proper place. Using color-coded bins or dividers makes restocking simple and enhances the visual appeal of the art area.
This way, your kids stay motivated to keep their space tidy and inviting. It’s a win-win!
Choose Clear and Stackable Containers
When you choose clear and stackable containers, you make it easier to spot art supplies at a glance without rummaging through boxes. Clear containers let both you and your kids quickly identify what’s inside, reducing clutter and encouraging independent creativity.
Stackable storage maximizes vertical space, keeping your art area neat and compact. Plus, transparent bins help you know when supplies are running low, so restocking happens on time.
Here’s a quick look at clear and stackable storage benefits:
| Feature | Benefit | Ideal For |
|---|---|---|
| Clear containers | Quick identification | Markers, crayons |
| Stackable storage | Saves vertical space | Paint bottles, glue |
| Variety of sizes | Fits different supplies | Brushes, paper, scissors |
Create Portable Storage Solutions
Where do you keep art supplies when creativity strikes outside the usual crafting area? To organize efficiently, create portable storage solutions that move with your kids. Use lightweight tote bags or plastic caddies with handles to carry essentials easily.
Clear, stackable bins with lids work great for transporting larger supplies while keeping everything visible. For smaller items like markers and paintbrushes, multi-compartment pencil cases or zipper pouches help organize and prevent loss on the go.
Rolling carts with multiple tiers and lockable wheels make shifting art supplies between rooms or outdoors smooth and hassle-free. Don’t forget to label each container clearly so you can quickly identify contents during spontaneous art sessions.
Portable storage keeps your kids’ creative tools organized and ready wherever inspiration hits. It makes grabbing supplies and setting up projects a breeze, no matter where you are.
Use Removable Dividers for Flexibility
You can customize your storage compartments with removable dividers to fit all kinds of art supplies. They let you quickly reconfigure space without any tools, making organization a breeze as needs change.
This flexibility keeps everything neat and easy to find. Plus, it’s super convenient when your supplies grow or shrink over time.
Adjustable Storage Compartments
Although art supplies come in many shapes and sizes, using removable dividers lets you customize storage compartments to fit your needs perfectly. Adjustable storage compartments maximize your craft storage by dividing bigger containers into smaller, organized sections.
You can easily reposition or remove dividers to accommodate different supplies like markers, paints, or brushes. This flexibility keeps your art supplies neat and clutter-free.
Here’s why adjustable compartments are a game-changer for your craft storage:
- Customize compartments to fit various art supplies
- Maximize space efficiency in storage containers
- Keep similar items grouped and prevent mixing
- Quickly adapt your storage to new projects or supplies
Using adjustable compartments ensures your kids’ art supplies stay organized and accessible. It just makes life easier when everything has its place!
Easy Reconfiguration Options
When your kids’ art supplies change in size or type, removable dividers let you quickly reconfigure storage bins to fit your needs. These dividers create customized compartments that adapt to various supply sizes without needing new containers.
You can move or remove them easily, which makes expanding or consolidating storage simple as your collection grows. Whether you’re organizing for seasonal projects, adjusting to your children’s preferences, or adding new materials, removable dividers provide flexibility.
Look for dividers that clip or slide into place, ensuring stability while allowing quick layout changes. Using removable dividers in your storage bins helps you maintain an efficient, adaptable system that keeps art supplies neat and accessible, no matter how your kids’ creative tools evolve.
Organize Books and Paper Upright
Storing coloring books and art paper upright in magazine holders or vertical file organizers lets you see and reach them easily. This method maximizes visibility and accessibility, making it simpler to keep your kids’ art supplies neat.
Use these organizing tips to streamline your setup:
- Place frequently used books at eye level for easy, independent access.
- Use clear containers or dividers to separate different paper types and sizes.
- Keep loose papers, scrap paper, and finished artwork in designated bins to reduce clutter.
- Regularly review the collection, removing damaged or outgrown books to maintain order.
Label Containers for Easy Identification
After organizing books and papers upright, labeling containers can help you spot art supplies quickly and keep everything in its place. Use clear, concise labels with waterproof material to avoid smudging or peeling.
Color-coded labels make organizing kids’ art supplies even easier by grouping items visually—like red for paints or blue for markers. Apply labels on the front or top of containers so you can easily identify contents without pulling everything out.
Using a label maker or printable templates keeps labels neat and uniform, boosting your overall system’s efficiency.
| Container Type | Label Example | Color Code |
|---|---|---|
| Paints | Acrylic Paints | Red |
| Markers | Washable Markers | Blue |
| Brushes | Paint Brushes | Green |
| Paper | Construction Paper | Yellow |
Designate Zones for Different Art Activities
Since kids enjoy a variety of creative activities, you can boost organization by designating separate zones for painting, coloring, and crafting. This approach keeps art supplies and crafts supplies neatly arranged by function, making it easier for your child to find what they need.
Create dedicated zones for painting, coloring, and crafting to keep supplies organized and easy to find.
To set up effective zones, consider these tips:
- Use clear storage bins with labels to sort paints, markers, paper, and more.
- Position frequently used art supplies within easy reach to streamline activities.
- Incorporate tables or mats to define each area and contain messes.
- Regularly adjust zones to match your child’s evolving interests and supplies.
It’s pretty simple, but it makes a big difference in keeping things tidy and fun!
Encourage Kids’ Independence in Cleanup
When you set up art supplies within easy reach and clearly label each container, kids feel more confident managing their own cleanup. Use low shelves or bins at child-friendly heights for art supply storage, so kids can easily find and return materials.
Incorporate removable containers or baskets, letting children grab what they need and put supplies back independently. Teach them to return kids art supplies immediately after projects, building good habits.
Visual cues like pictures or color-coded labels help kids identify where everything belongs, fostering responsibility. Make cleanup a fun routine by setting a timer or creating a consistent habit, encouraging kids to tidy up without reminders.
This approach not only keeps your space organized but also empowers kids to take charge of their own art supply storage and cleanup. It’s a win-win for everyone!
Frequently Asked Questions
How to Keep Kids Art Supplies Organized?
You can keep kids’ art supplies organized by using clear containers, labeling bins, and designating storage spots.
It really helps to encourage your kids to put items back after use. Plus, regularly removing broken or unused supplies keeps the clutter at bay.
How to Organize a Lot of Art Supplies?
Like a puzzle, you’ll sort your art supplies by category, use clear bins with labels, and stack them smartly.
Keep your favorites close, toss dried-out items, and soon your creative chaos will turn into a masterpiece of order.
What Are Some Creative Ideas for Storing Art Supplies?
You can use repurposed jars for brushes, hanging pegboards for tools, and stackable bins for paper.
Try zippered pouches for portability and designate baskets or trays for paints and markers to keep everything sorted creatively.
These ideas not only save space but also make it easy to find what you need when inspiration strikes!
How to Declutter Art Supplies?
Imagine your art supplies as a wild garden—prune it by tossing dried markers and broken tools. Sort what’s left, and tuck extras away.
That way, you’ll keep only what blooms creativity and clear clutter’s chaos. It makes your creative space inviting and easy to work in!
Conclusion
By following these tips, you’ll have your kids’ art supplies organized in no time, making creativity flow without a hitch. Remember, a place for everything and everything in its place keeps the chaos at bay.
When you set up clear zones and easy storage, cleanup becomes a breeze, and your kids will take pride in tidying up on their own. With a little effort now, you’re setting the stage for countless imaginative masterpieces ahead.
Efficient organization of kids art supplies not only simplifies cleanup but also encourages kids to explore their creativity freely. Using labeled bins, drawer organizers, and accessible storage solutions helps keep everything in order. Plus, involving your children in the organizing process teaches responsibility and makes the system easier to maintain.
So, get started with these simple tips to create a fun, clutter-free art space that inspires and supports your little artists every day!