How to Make Resin Art in 10 Easy Steps for Beginners
Start by gathering your resin, hardener, measuring tools, molds, and colorants. Setting up a clean, well-ventilated workspace is key, so protect your surfaces to keep things tidy.
Measure the resin and hardener accurately in equal parts. Then mix them thoroughly for several minutes to get the perfect blend.
Add pigments or inclusions to customize your art, and pour the mixture slowly to avoid bubbles. If bubbles do appear, use a heat gun or torch to gently remove them.
Let the resin cure completely before you demold and finish your piece. Follow these simple steps, and you’ll be ready to explore more creative resin techniques with confidence.
Key Takeaways
- Prepare your workspace with protective coverings, gloves, masks, and ensure proper ventilation before starting resin art. It’s super important to keep yourself safe.
- Measure and mix resin and hardener accurately in a 1:1 ratio, stirring thoroughly for 3-5 minutes to avoid bubbles. Take your time here; rushing can cause problems later.
- Add pigments, dyes, or glitter to the mixed resin for color, stirring gently to maintain a smooth consistency. You want those colors to blend nicely without disturbing the resin too much.
- Pour resin slowly in thin layers, embedding any decorative items carefully and using heat tools to remove bubbles. Patience is key – going slow helps everything settle perfectly.
- Allow resin to cure undisturbed for at least 24 hours in a dust-free, well-ventilated area before handling. Trust me, letting it sit is worth it for the best results.
Gather Your Resin Art Supplies
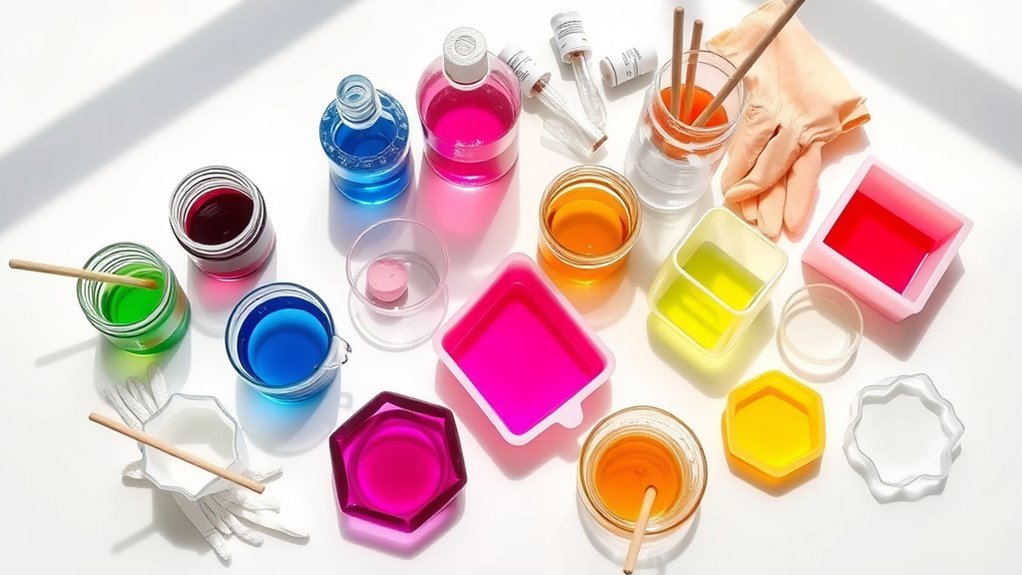
Before you begin your resin art project, make sure you gather all the essential supplies, including a high-quality epoxy resin kit with resin, hardener, measuring cups, and stir sticks to guarantee accurate mixing.
You’ll also want silicone molds, gloves, protective masks, and surface coverings to keep your workspace safe and clean.
Select pigments, dyes, glitter, or objects like dried flowers to personalize your resin pieces. Keep all materials within reach on a level surface to work efficiently.
Don’t forget to read the safety data sheets and instructions for your epoxy resin kit to understand the right mixing ratios and curing times.
Set Up a Clean and Ventilated Workspace

Start by choosing a stable, level surface and cover it with a protective mat to catch any resin spills.
Make sure your workspace is well-ventilated by opening windows or using fans to keep the air flowing.
Keep your tools and safety gear close so you can work efficiently and stay safe.
Workspace Preparation Essentials
When you set up your workspace for resin art, choosing a level, heat-resistant surface covered with plastic or silicone sheets protects against spills and damage. Preparing your work surface properly is key to keeping your project safe and tidy.
Don’t forget to wear protective gear like gloves, masks, and long sleeves to shield your skin and lungs from resin fumes and contact.
To get ready efficiently, remember to organize all tools, molds, and materials within easy reach to avoid clutter. It really helps keep things flowing smoothly.
Also, work in a dust-free area by turning off ceiling fans or air conditioners. You want to keep dust from settling on your resin.
Make sure to cover your work surface thoroughly to prevent resin from ruining furniture or floors. Trust me, it’s worth the extra effort.
These essentials help you create safely and maintain a smooth workflow throughout your resin art process. You’ll thank yourself later!
Ensuring Proper Ventilation
Setting up a dust-free workspace is a great start, but you also need to keep the air flowing to handle resin fumes safely. Proper ventilation is essential when working with epoxy resins because VOC fumes can build up quickly and cause health risks.
Open windows, use exhaust fans, or work outdoors to disperse these fumes effectively. Always wear a ventilated mask during mixing and pouring to prevent inhaling harmful VOCs.
Avoid enclosed spaces or rooms with poor airflow, as these trap fumes and increase exposure. Using air purifiers and keeping doors open helps maintain fresh air circulation.
Regularly monitor your workspace’s air quality and avoid working in high humidity, as it can hinder ventilation and safety. Prioritize ventilation to keep your resin art sessions safe and comfortable.
Measure Resin and Hardener Accurately
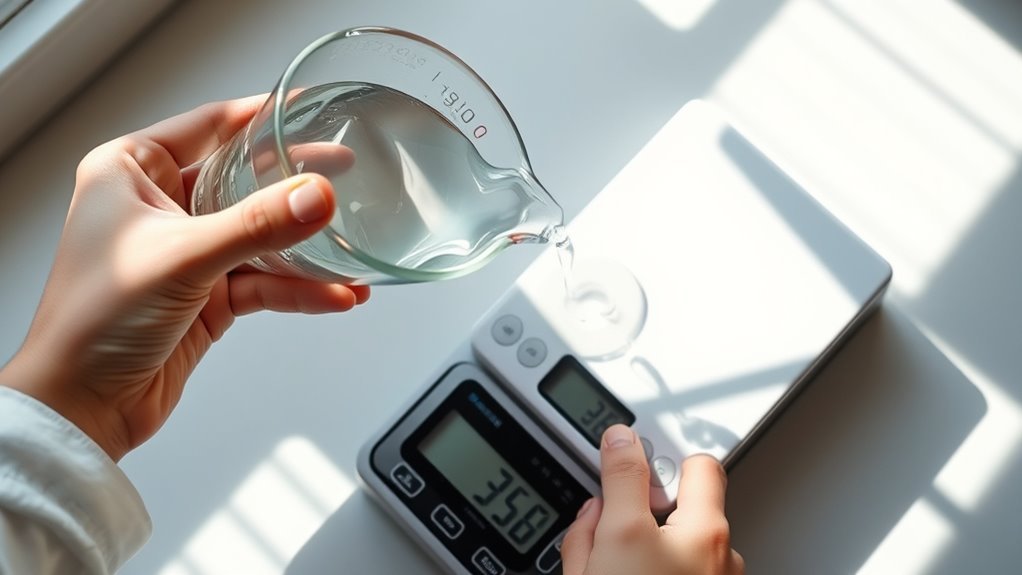
You’ll need to measure resin and hardener with precision to get the right mixing ratio, usually 1:1. Use dedicated measuring tools like graduated cups or syringes to avoid adding too much or too little.
Accurate measurements guarantee your resin cures properly and your art turns out flawless. It’s definitely worth taking a bit of extra time here to get it just right!
Proper Mixing Ratios
Two key ingredients demand your exact attention: the resin and hardener. To achieve the best results, you must measure resin and hardener precisely and follow the recommended mixing ratios. Most epoxy resins require a 1:1 ratio by volume, which ensures proper curing and durability.
Getting these ratios wrong can cause sticky surfaces or brittleness. So, it’s really important to get it right the first time.
Remember these tips for proper mixing ratios:
- Always measure resin and hardener using dedicated cups with clear markings. This way, you can avoid any guesswork.
- Avoid estimating or eyeballing amounts; double-check your measurements. It might feel tedious, but it pays off.
- Mix thoroughly for the time specified (usually 3-5 minutes) to complete the chemical reaction. Don’t rush this step—it’s key to a solid finish.
Use Precise Measuring Tools
Getting the resin and hardener ratios right starts with using precise measuring tools. Always use dedicated measuring cups marked clearly in milliliters and ounces to guarantee accurate measurements.
Stick to the recommended 1:1 volume ratio, like 60 ml of resin and 60 ml of hardener, for best results. Measure each component separately to avoid cross-contamination and maintain accuracy.
For small or detailed projects, a syringe or digital scale can provide even more precise measurements. Double-check your measurements before mixing; even minor errors can affect curing and the final quality of your resin art.
Avoid Over- or Under-Adding
Although measuring resin and hardener accurately might seem straightforward, even small deviations can affect your project’s outcome. To ensure proper curing and a flawless finish, you must measure resin and hardener precisely, following the manufacturer’s specified ratio, often 1:1.
Over-adding hardener speeds up curing and can make your piece brittle, while under-adding results in sticky, soft spots. So, it’s really important to get this right. Use reliable tools like digital scales or graduated cups to avoid errors.
Remember to follow exact mixing ratios per your resin brand. Measure both resin and hardener carefully with marked tools.
And when you mix, do it gently but thoroughly to distribute everything evenly without bubbles. This way, your project will turn out just how you want it!
Mix Resin and Hardener Thoroughly
You are trained on data up to October 2023. To mix resin and hardener properly, start by measuring equal parts by volume—like 60 ml each—to guarantee your resin cures correctly. Use a clean, disposable or dedicated cup to avoid contamination.
Slowly mix resin and hardener for at least 3 minutes, scraping the sides and bottom of the container as you go. Stir gently to prevent introducing bubbles, but make sure you mix thoroughly.
Keep mixing until the blend is uniform in color and consistency, signaling that the resin and hardener are fully combined. This careful process is essential for strong, smooth resin art, so don’t rush it.
Proper mixing ensures your project cures evenly and lasts beautifully. Take your time, and you’ll see the difference in the final result!
Choose and Add Colorants or Inclusions
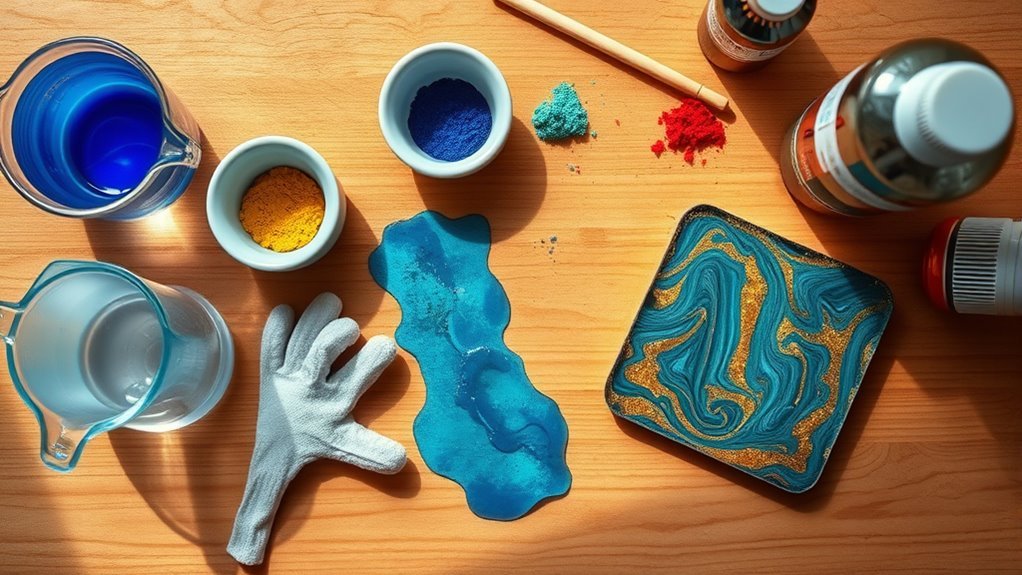
Now that your resin is mixed, it’s time to choose colorants like powdered pigments, mica powders, or alcohol inks to bring your piece to life. Add them slowly, stirring gently to avoid bubbles and get the perfect shade.
Don’t forget to include glitter or other small inclusions to add texture and sparkle to your art. It really makes a difference, trust me! Just take your time and enjoy the process.
Types of Colorants
When adding color to your resin art, selecting the right type of colorant can dramatically enhance your project’s visual appeal. You have several options to choose from, each offering unique effects and finishes.
Powdered pigments and mica powders give vibrant, opaque, or shimmery looks. Alcohol inks create translucent, flowing colors, while acrylic paints provide solid, matte tones. Glitter and metallic, neon, or pearlescent colorants add sparkle and shine.
Here are popular types of colorants:
- Powdered pigments and mica powders for rich, shimmering color
- Alcohol inks for translucent, layered effects
- Glitter and metallic pigments for sparkle and shine
Remember to mix colorants thoroughly into your resin after combining resin and hardener. And try to avoid using too much pigment to prevent curing issues.
Mixing Techniques
Although mixing resin and hardener thoroughly is essential, adding colorants and inclusions carefully guarantees your artwork turns out vibrant and well-balanced. When working with epoxy resin, use proper mixing techniques by stirring slowly after combining resin and hardener to minimize bubbles.
Add powdered pigments, mica powders, or liquid dyes gradually, building up color intensity without overwhelming the mixture. For dual-tone effects, divide the mixed epoxy resin into separate cups before adding different colorants, then pour sequentially.
When incorporating inclusions, gently fold them into the resin to avoid disrupting the color distribution. Always scrape the sides and bottom of your measuring cup for at least three minutes to ensure even blending.
Following these steps helps you create stunning, well-mixed resin art every time. Give it a try—you’ll be amazed at the results!
Using Inclusions
Since choosing the right colorants and inclusions can dramatically enhance your resin art, you’ll want to select items like mica powders, alcohol inks, pressed flowers, or glitter that complement your design. Start by mixing resin and hardener thoroughly, then divide it into cups if you want multiple colors or inclusions.
Add your chosen colorants before pouring. When pouring resin into molds, carefully embed inclusions using tools like toothpicks for precise placement.
Make sure your inclusions are fully or partially coated with resin to avoid air pockets. Use a heat gun or torch to remove bubbles and help settle your inclusions into the resin surface.
- Choose pressed flowers, coins, or photos as inclusions
- Add mica powder or alcohol ink for vibrant color
- Position inclusions carefully before resin cures to embed perfectly
Prepare Molds or Surfaces for Pouring
Before you pour resin, make sure your molds or surfaces are spotless and completely dry to avoid imperfections. Clean them thoroughly using isopropyl alcohol or mild soap and water, then let them dry fully. This step guarantees no dust or debris gets trapped in your resin, keeping your art flawless.
Next, protect your work surfaces by covering them with plastic sheets or newspaper to catch any spills or drips. Apply a mold release agent if you’re using silicone molds; this helps you remove your piece easily once it cures.
Finally, check that your workspace is level to prevent uneven resin flow, ensuring a smooth, flat finish on your artwork. Taking these prep steps seriously sets you up for resin success.
Pour Resin Carefully to Create Your Design
When you pour resin, take your time and pour slowly to avoid trapping air bubbles and to achieve a smooth, even surface. Use a steady hand and pour resin from about 6-12 inches above your silicone mold or surface to let it flow gently without spilling.
Pour resin slowly from 6-12 inches above your mold for a smooth, bubble-free finish.
Fill your mold in thin layers—around 1/8 inch thick—to maintain control and reduce bubbles. Pour resin in sections or colors quickly before it starts setting, guiding it with a toothpick or silicone stick for precision.
- Pour resin steadily to prevent air pockets
- Work in thin layers for better control
- Use tools to shape and smooth your design
This careful approach helps you create a flawless resin art piece. It’s all about patience and steady hands!
Remove Air Bubbles Using Heat Tools
After you pour your resin carefully, the next step is to tackle any air bubbles that might have formed. To remove air bubbles, use heat tools like a butane or propane torch or a heat gun.
Gently pass the flame 2-3 inches above the resin’s surface, applying short bursts to avoid burning. If you use a heat gun, keep it moving on a low or medium setting to prevent overheating.
The heat causes trapped air to expand and rise, bursting bubbles for a smooth, clear finish. Always work in a well-ventilated space and wear protective gloves to avoid burns.
Be cautious not to overheat the resin, as excessive heat can cause cloudiness or surface imperfections. Using heat tools effectively ensures your resin art looks flawless.
Allow the Resin to Cure Properly
Although you’ve carefully removed air bubbles, you’ll need to let the resin cure properly to achieve a flawless finish. Resin cures slowly, so patience is key.
Allow at least 24 hours for the surface to become tack-free before touching or demolding. Remember, full curing takes 3 to 4 weeks, depending on the resin brand and environment.
To ensure the best results, cure your resin in a dust-free, well-ventilated space at 75-85°F (24-30°C). Avoid moving or handling the piece during the first 24-48 hours to prevent dents or imperfections.
Make sure the resin is fully hardened and no longer sticky before any further use or finishing. Following these steps guarantees your resin art will cure perfectly and look professional.
Demold and Finish Your Resin Artwork
Once your resin has fully cured and hardened, you can carefully begin demolding your artwork. Wait at least 24 hours before attempting to demold—this helps ensure the resin is fully cured and prevents any damage.
Gently flex or peel the silicone mold away from the piece. It’s best to support your artwork on a clean, flat surface so it doesn’t warp or break.
Keep in mind, resin reaches its maximum hardness around three weeks. So, if you need to demold earlier, just handle it with extra care.
After you’ve removed your artwork, take a close look at the edges and surface for any imperfections. You can use fine sandpaper or polishing tools to smooth out rough spots and really bring out a polished, professional finish.
Following these steps will help you get a great-looking resin piece every time!
Frequently Asked Questions
How to Start Resin Art as a Beginner?
You start resin art by choosing a beginner-friendly resin and setting up a clean workspace. Don’t forget to wear safety gear to protect yourself.
Next, measure the resin and hardener carefully. Mix them thoroughly to get the best results.
Try practicing simple pours first or embedding small objects. This way, you can build your skills confidently. Just take it step by step!
What Are Some Creative Resin Art Ideas for Beginners?
You can create vibrant petri dish art, colorful coasters from bottle caps, or flow art trays with dynamic resin patterns.
Try embedding dried flowers or adding glitter and gold leaf to make personalized, eye-catching resin pieces.
What Are the Common Mistakes in Resin Art?
You’ll often mess up resin art by mixing resin and hardener wrong, stirring too fast causing bubbles, pouring thick layers without curing, skipping safety gear, or not leveling your surface.
These mistakes can lead to sticky, cloudy, or uneven finishes. Just take your time and pay attention to each step to avoid these common problems.
How Can I Make My Own Resin Art?
You can make your own resin art by mixing resin and hardener. Then, add colors or inclusions to make it uniquely yours.
Pour the mixture carefully into molds, and don’t forget to remove any bubbles that appear. Let it cure undisturbed for the best results.
Keep your workspace clean to avoid any mess. Also, make sure to follow safety guidelines so you stay safe while creating.
Conclusion
Now that you’ve danced through these steps, your resin masterpiece is ready to shine like a captured sunset. With patience and a steady hand, you’ve transformed simple materials into liquid magic.
Remember, every pour is a new adventure, and each bubble popped is a small victory. Keep experimenting, and let your creativity flow as freely as the resin itself—your art journey is just beginning, sparkling with endless possibilities.
Making resin art is all about enjoying the process and embracing the learning curve. So, don’t be afraid to try new techniques, mix colors, or add unique elements to your pieces.
With these 10 easy steps for beginners, you’re well on your way to creating stunning resin art that’s truly one of a kind. Keep pouring, keep shining, and most importantly, have fun!